

- The RAD Wood Restoration 2024 Contest is now closed, with winners T. Robinson, Timothy, Alisha McGhee, and Brandon Workman taking top honors.
- All Restore-A-Deck Prep and Restore-A-Deck Wood Stain products must be purchased exclusively from Restore-A-Deck.com to qualify.
- Contestants must use the Restore-A-Deck 3-Step Process, including Wood Cleaner, Wood Brightener, and Wood Stain, to be eligible for top prizes.
- Entries require before and after photos of the wood project, plus a short description of products and Restore-A-Deck Stain Color used.
You can see prior years here:
Restore-A-Deck 2023 Contest
Restore-A-Deck 2022 Contest
The RAD Wood Restoration 2024 Contest is closed!
First Place
T. Robinson
First Place = $500
Second Place
Timothy
Second Place = $300
Third Place
Alisha McGhee
Third Place = $150
Honorable Mention
Brandon Workman
$150
Thanks to all the entries this year! All entries were excellent and that made it very hard to choose the winners!
We will be contacting the winners via email.
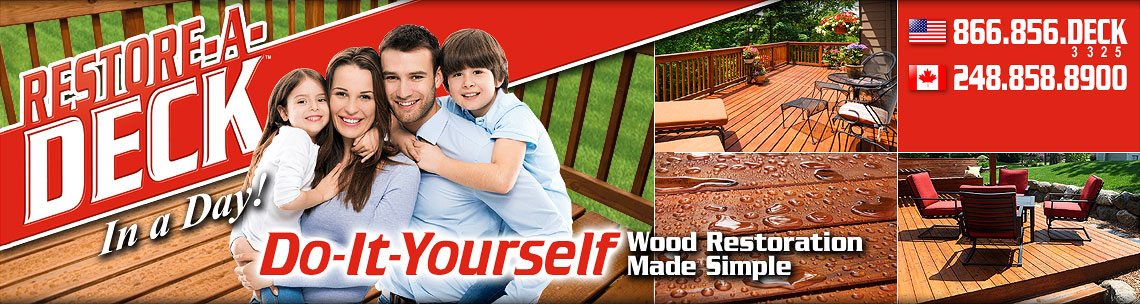
Restore-A-Deck 2024 Wood and Deck Restoration Contest Details
-
- All Restore-A-Deck Prep and Restore-A-Deck Wood Stain must be purchased first from this online eCommerce site (Restore-A-Deck.com) between January 1st – September 10th, 2024.
- The Restore-A-Deck 3-Step Process must be used.
- The deadline for entry is September 20th, 2024.
- The winners will be decided by October 15th, 2024 by our team.


The RAD Contestant Winners will Receive
- First Place = $500
- Second Place = $300
- Third Place:= $150
How To Enter Contest
- Enter by September 20th, 2024.
- In the comment section below, post a short description of your deck/wood staining project, the Restore-A-Deck products used to prep, and the Restore-A-Deck Stain Color used. Was the Restore-A-Deck Stain applied the same day as the prep? Yes or No?
- Examples of wood projects that can be entered: Decks, Fences, Wood Side Homes, Log Cabins, etc.
- 1-2 pictures before the prep of the wood. You can still enter if you do not have the before pictures.
- 1-2 pictures after the prep of the wood using the RAD Prepping Products. You can still enter if you do not have the after prep pictures.
- 2 pictures after the staining using the Restore-A-Deck Wood Stain must be included.
- If having trouble uploading the pictures, please make your picture(s) size smaller (below 3 MB).
Any questions or issues posting, please ask in the comment area.
We look forward to all the entries!
*Disclaimer: All products must be purchased from Restore-A-Deck.com. The contest is not open to products purchased from other online dealers or from physical stores. All 3-Steps in the Restore-A-Deck system will need to be used to win 1st, 2nd, or 3rd Place: Step 1: Restore-A-Deck Wood Cleaner or Restore-A-Deck Stain Stripper. Step 2: Restore-A-Deck Wood Brightener. Step 3: Restore-A-Deck Wood Stains.


We did this with restore a deck sorry no pic before
This is my brothers deck that we restored
Looks awesome. What color and is the flooring wood IPE or something else?
Project: Recondition the 650 sq ft deck I built as my Covid project in 2020.
Products used: Purchased the 3-step stripper & brightner combo kit with the 5 gallons of light walnut semi-transparent stain & the staining brush.
The RAD stain stripper was applied with a pump sprayer, let sit for 20 minutes, then used a powerwasher to remove the older water based stain. It was a FANTASTIC process & so awesome to see the stain slide off the wood in long strips!!
The RAD neutralizer/brightener was also applied with a pump sprayer & let to sit 20 minutes before rinsing with a garden hose sprayer.
This process took me 3 days to do by myself as the deck is larger. I did about half of one side the 1st day & the other half the 2nd day. Day 3 was the outside framing, privacy fence, & both stair areas.
I had to wait to stain for a few days due to rainy weather, but the wood still looked great (no dirt, debri, etc)
RAD stain was applied wet-on-wet for 2 coat coverage & used the RAD brush. The brush was perfect for doing 2 boards at a time & being able to push the stain into the open sections between the boards. It was also great applying to the 2×12 frame boards I used all around the outside of the deck, & made quick work of both of the stairs. I hand brushed the front & back of the fence boards to make sure there weren’t any drips. The stain applied so smoothly to all surfaces & the 2nd coat took half the amount of stain compared to the 1st so it went quickly!
All the staining took me 3 days: day 1 was half the floor, day 2 was the other half of the floor, day 3 was the outside framing, both stairs, & the privacy fence.
I needed to complete the railings to finish the whole project & used the RAD cleaner/ neutralizer for all of that wood before staining & installing
Now that it is finished I’m ecstatic with the results!!! The color is a perfect complement to my cedar house. The process was very well explained so I knew clearly what to do & how to do it.
Thanks for making such a stellar product!!
Oops. This was supposed to say 950 sq ft, not 650.
I used RAD Stripper and Brightener to prep my 10 x 40 deck, then used RAD Light Walnut semi-transparent stain. We usually get a fair amount of snow in the winter and hot sun in the summer. The deck went too long without proper care and as a result the stain was coming off in several places and the boards were very dry and weathered in other areas.
The deck was a very dark color, which I didn’t like and wanted something that would match the railing better so went with the Light Walnut. It took longer to strip the deck than I thought it would so, used the RAD Stripper and Brightener one day but had to Stain a couple days later. I am very happy with the results and love the color.
I forgot the picture after the prep work but have a before and a couple after.
Tried resizing phone photos 🤞🤞.
Apologies for any additional photos, multiple entries,etc.
Purchased:rad stripper with both additives, rad Brightener and rad dark walnut semi. Application was brush only. Thanks
*3044 29th Street*
*3044 29th Street*
Posted approx 6-12 pics but I only see two? Maybe the rest will show up after awaiting for approval notification drops. Hopefully so. Have some good pics
Your pictures were most likely too large in size. Try to repost at smaller size or a few at a time.
*3044 29th Street*
Thanks
3044 29th Street
*3044 29th Street*. Bought house in 2019 and fence had old reddish box store stain on it (Behr) which was approaching 8 years of age, and showing it from the San Diego Sun.
After alot of reviews and testing samples from rad, twp & defy I chose the rad products. In the pics you’ll see the different stages from removing the old stain with the rad stripper & both additives. Used the rad Brightener and rad semi solid dark walnut.
The stripper products worked so good. The staff was very helpful with tips and advice. Applied all the stain with a brush. Live on a large corner lot with additional fence down the side yard. Wasn’t able to prep and stain the same day due to my work schedule and the SIZE sq ft of the fencing. Followed advice from the website employees through the chat and didn’t let too much time lapse between stripper and applying stain. I did both sides of the fence.
Its been on the fence since June and still looks great. Get lots of compliments. If your not sure get the RAD. awesome stuff
Entered contest using my phone. Apologies for any duplicate photos.
Thanks. Looks like I have to submit a few postings to get my phone photos entered.
RAD stain stripper
RAD neutralizer/brightener
RAD semi-transparent stain (natural)
Just finished restoring a 38 year old cedar deck at our cottage in Huntsville Ontario. It was last sealed with Thompsons transparent water seal 3 years ago after many years of neglect before that. South facing deck that gets very hot in the sun and lots of snow sitting on the deck from November thru April. I had done some research on deck stains and decided on RAD in part because it was approved for use in Canada. There are excellent Q & A resources for RAD and all details and questions were addressed. We used Restore-a-Deck stain stripper applied with a pump sprayer, let sit for 20 minutes on a rather cloudy afternoon and used a powerwasher to remove old sealer and mold followed by RAD neutralizer/brightener for 20 minutes and rinsed well with garden hose sprayer. It is a large deck so we decided to apply the stain the following day because it was time for a martini and some grilling: RAD semi-transparent (natural- 5 gallons), 2 coats wet-on-wet using the RAD brush. We worked on deck sections sequentially so we could apply the second coat about 20 minutes after the first coat since it was sunny and 78 degrees F and didn’t want the first coat to dry completely before we could apply the second coat. Also refinished the railings with RAD paint stripper (4 hours applied to old peeling solid stain), followed by washing, dry and sanding due to some feathering. Stained with solid stain in Cypress but did not take photos to share. Love the look of the old deck + railing now.
Project: Strip, brighten and stain our 3,900sqft deck.
Products used: Restore-A-Deck Stripper, Restore-A-Deck Brightener, Restore-A-Deck Paint and Solid Stain Gel Stripper, Restore-A-Deck Semi-Transparent Wood Stain-Natural Color
We bought our house in 2015. There was 1,600sqft of decking that was original to the home. Our home backs up against a gorge in WV with a lot of trees and fantastic views. We wanted to have even more access to our backyard and acreage, so we added an addition 2,300sqft of decking. The new deck has various tiers to enhance and offer different views. It also has a covered screened-in bar area on the lowest tier.
The original decking had a brown solid stain that was in good shape when we bought our house. We prefer a more natural wood-look and were considering stripping the original deck and staining everything with a semitransparent afterwards. Fortunately, or unfortunately, depending on how you look at it, our deck was chosen for a “Backyard BBQ” contest through our local news station. This meant that we would host the news station for an evening BBQ and football game and they would showcase the deck or backyard. We did not have time to strip the original deck before the segment. Therefore; in an effort to have some uniformity, we matched the old solid stain and added it to the new deck .
Over the next 9 years, the solid stain started to peel and flake on all of the horizontal surface and some vertical surfaces. We decided it was time to protect our investment and revamp our deck. After doing our research, we came across Restore-A-Deck products. Our goal was to strip the existing solid-stain and apply a semi-transparent stain that could be maintained with cleaner, brighter and stain in subsequent years. Given that our project had 3,900sqft of deck to be stripped, brightened and stained, it was very promising to find a product that allowed all of the work to be completed in the same day. If we were short on time, it was especially nice that we had the option to add the stain while the wood was still damp.
Given our work schedules, weather, vacations, and unforeseen issues, our timeline for completion was this entire summer. We are pleased to announce that we started in the middle of May and wrapped up this past weekend. Being able to stain on the same day as using stripper and brightener, made a huge difference in our ability to be efficient when we were working.
We are extremely pleased with Restore-A-Deck products and their ability to rejuvenate and protect a large investment such as this one. Restore-A-Garage is next!
I undertook a significant renovation of our badly aged and damaged 320sqft deck this spring, that came with the home we purchased in SC as of 2022. The prior owners never took care of it and never stained it. They didn’t even use screws on every joist to hold down the 2×6 pine boards used for the decking, which caused many of them to cup. In addition to the deck, we added a pergola in 2023 that needed to be stained as well.
While I considered oil, I was more interested in a high performing modern water-based product since we are in the South. I learned from reviews and stain longevity tests that Restore-a-Deck was one of the best deck protection products on the market, as well as being competitively priced, and so purchased the 3-step system (cleaner and brightener) combo kit with the 5 gallons of cedar semi-transparent stain after initially purchasing the stain color sampler pack.
After a lot of restoration work that took way longer than expected, I was finally able to pressure wash and begin with the Step 1 and 2 products. I stained the bulk of the pergola first and then got to the deck. Was the deck stained the same day of prep? No, as the prep was just too much and then due to rain and other challenges, wasn’t able to stain it until a week or so later. We stayed off the deck in the interim. I tried a pad, but the deck was mostly hand brushed as I feel it does a better job, is more efficient in terms of stain use, and allows you to get in-between the boards to an extent which makes for a better presentation. Most of the boards got 2 coats of stain and the 5 gallon kit ended up being plenty for the 16×20 deck and 19×9.5x10ft pergola. I followed RAD’s stain guides.
As of several weeks ago (late August) I’ve finally mostly finished with the project. While I was concerned about the condition of the boards and the mixing of new wood and old wood, once stained with the cedar color, it more-or-less evened out and we are very happy with the color and to have the eyesore that was our deck restored!
Overall, while the South is a challenging environment to stain and restore a deck in, I was very pleased the RAD system of products and stain and would absolutely recommend (and already have) their products to others I meet.
Last year we took all the boards off our old deck and planed the back side so we could flip the boards and use the fresh wood side up. I used the RAD cleaner and brightener on the boards prior to applying one coat of RAD semi-transparent wood stain in Dark Walnut. Directions said to only apply one coat the first year on new wood.
We live in northern MN so the first year stain on the deck had gone through our winter season with snow and shoveling. This year I repeated this same process only I applied two coats of the stain the same day as I cleaned and brightened. I did the cleaning and brightening in the morning and my deck on the north side of the house was ready to stain by afternoon. I used a staining pad on a pole to apply the stain and it was very easy to do. Having two coats applied should now hold up through our winter.
The deck looks beautiful and I am happy with the outcome. I did not take many pictures during the process, but you can kind of see what the deck looked like before I started, and there are two pictures of how it looks after completed.
Nice job!
Project: 11+ year old wood deck.
Products Used:
Timeframe: 2-3 weeks
We built our deck over 11 years ago and we have had to re-stain it 3 times in that time period and have never had results as great as we got with the restore-a-deck products.
When choosing the stain color we went with a darker color because we assumed, like previous products we had used, the deck would not get completely back to a bright, unfinished surface. We were wrong. I also had to replace a couple of boards due to rot and we were worried that it would be immediately obvious which ones were replaced, wrong again.
I started with just cleaning off the deck without any products using our pressure washer. Next I used the cleaner and my pressure washer, immediately noticed the difference. I then went on to use the stripper with a booster and my wife and I were amazed with the results. We almost didn’t think we would need to use the brightener but when I did and, WOW, it looked like a brand new deck only better. I then proceeded to do some light sanding with a palm sander. This process was all done over the course of about a week during free time with the biggest gap of time between brightening and sanding. I cannot stress enough how smoothly this whole process went and with every step I was increasingly pleased with the results.
I had to take about a week off before finding time to do the actual staining. This ended up going quicker than I anticipated. I did a wet application applying two coats and it came out amazing. The only way you can tell that the new boards are new is because the water on them beads up a little more than the older boards. You can’t see any of the old staining on the deck or dark marks that had shown up over time, it really looks like a brand new deck. We did have a little bit of tackiness for about a week, but after reaching out to Restore-A-Deck support we determined it was due to ground moisture and ventilation issues under the deck that slowed down the curing process and that has since been corrected and gone away.
We have used a variety of products on our deck over the years and this system has been far superior than anything we have used before and we will definitely use it again on our front deck when that is ready to be done. I also plan to post a video review of my deck restore on Youtube when I find the time, so stay tuned! If anyone is contemplating if restore-a-deck is worth it, it is, don’t even question it, you won’t regret purchasing this system.
Looks great! Love the final color!
Forgot the photos! 🙄 Here they are.
I used RAD stripper and brightener to prep my small deck, followed by RAD Light Walnut semi-transparent stain. I didn’t prep and stain the same day, but I have in the past–nice to have the flexibility to spread things out over a few days. The deck looks brand new whenever I use these products and follow the simple steps.
Project: 35+ year old deck with new-to-us but previously used decking, deck stairs, and storage area underneath the deck
Products Used: RAD Wood Stain Stripper, RAD Paint and Solid Stain Stripper, RAD Brightner, and RAD Solid Stain in Brown Oak (3.5 gallons)
Timeframe: Two weeks due to the initial condition of the deck and direct sunlight most of the day. Wood was dry when stain was applied.
Our deck is almost 40 years old; it was built in the 1980’s by the original owner of the house. The deck boards were splintered, curled, and popping up, but the rest of the deck was solidly built.
We decided to replace the deck boards and railing in 2021 when lumber was ridiculously expensive. To save money, we purchased used deck wood from someone who converted his deck to composite wood. The used deck wood was coated in layers and layers of stain and paint, but it still had a lot of life left in it. We pulled off the old decking and replaced it with the new/old decking.
We researched the best products to restore the deck boards and landed on Restore-A-Deck. We purchased the RAD Wood Stain Stripper and RAD Brightener with the hopes of preparing the deck for stain. Unfortunately, due to a severe back injury my husband sustained while working on another house project and other circumstances beyond our control, the project sat unfinished for three years.
This June, my daughter and I pulled the RAD Wood Stain Stripper from our basement shelves that we had purchased a few years prior and got to work. But wait! We not only had stain to remove, but there was also paint to remove from the old deck boards. Ugh. Somehow I missed that detail when ordering the product a few years prior. We were hopeful that the wood stain stripper would still do the job since the paint and stain were somewhat wearing off the old deck boards. (The old deck wood sat exposed to the elements for three years.) However, the remianing layers and layers of paint and stain were challenging to remove. After using the wood stain stripper twice, there were still many stubborn paint spots left taunting us. We knew we needed more help, and we knew where we needed to go to get that help.
We ordered a gallon of RAD Paint and Solid Stain Stripper and got to work. It took two applications of this product and a powerwasher to finally remove most of the paint. After we removed as much paint and stain as we could from the deck boards, we used RAD brightener and looked forward to when we could finally start staining. Wanting to get a frest start when the sun wasn’t beating down on the deck, we waited until the following da to start staining.
As much as we wanted to use a transparent stain, we thought it best to use a solid stain on the old deck boards which bake in the sun all day long. We purchased three gallons (then a fourth gallon) of RAD Solid Stain in Brown Oak. We applied two coats on the deck boards, railing, stairs, stair railing and storage area underneath the deck. We *might* have been able to finish this in a day or two, but we were limited to working on this project before 8:30 am when the sun first hits the deck and after 6:00 pm when the sun wasn’t as intense.
The deck is finally finished and looks amazing! We are thankful for the RAD family of products. It gave our old deck new life and added (outdoor) square footage to our living space.
Project: 30 yr old partially covered deck
Products used: RAD Paint & Solid Stain Stripper, RAD Cleaner & Brightener and RAD Semi-Transparent Wood Stain in Dark Walnut – applied wet
My spring vacation this year was 8 days of stripping, cleaning, brightening and staining my 30 year old partially covered deck.
The covered portion had approximately 4 coats of solid stain in some areas, so I used the RAD Paint & Solid Stain Stripper. That worked amazing! Boy, was I relieved. After covering some areas and letting it sit, I used my powerwasher to remove the solid stain.
On the smaller deck that is exposed to the elements, there was no solid stain remaining. I powerwashed it, used the RAD Cleaner and then the Brightener. Both steps were super easy!
The best part of all of this is I didn’t have to wait days for the wood to dry before applying the stain. Springtime in Michigan – that was a HUGE selling feature!
I applied 2 coats in 1 day using the RAD 14″ Staining Brush, which made the job extremely fast. The color is beautiful and I am so happy with the product and results. I will be reordering soon as I have my front porch to finish before winter!
Nice job!
Combo project (part2).
Added Pictures.
Wood: Treated SYP.
Product: Restore a Deck- Natural Semi-Transparent. Applied with air sprayer for handles and pergola, and 14″ brush for deck surface.
4 kits of 5 gallon combo kit.
My project may be a little more involved than most, and took a little more time but ultimately this is the final project and my entry for 2024. Before you can restore a deck, you must build a deck…..The year is 2023, my wife informs me that she would like to have a pool built after discovering we are pregnant and the kids need something to do all summer. After having a couple of pool quotes and realizing this was not in the realm of possibility I got to work and pricing out my DIY options….. after some careful drawings, planning, and pricing it down to the final nail….. We decided it was a GO. I got to work. I spent mainly Fridays, Saturdays and Sundays, sun up to sundown working on my vision. After 3 months of working, it was done. 36×40 Deck around a 25ft partially in ground pool…. The wood I got for the project was treated SYP and extremely wet, thus I felt it was necessary to give it 6 to 12 months to really dry out before I started my restore deck staining
Fast forward to April 2024, there is a long weekend on the horizon, and sunny weather ahead. It is time to stain the project I worked on for so long. After more research I decided the restore a deck option was the best option for me.
The first day was spent mainly cleaning/pressure washing, brighting, and rinsing….sun up to sundown. It took me approximately 12 hours to fully clean/brighten all surfaces with the restore a deck cleaner and followed up with the brighter on all surfaces including the deck, the wall, Pergola and the handrails. Apply with hand sprayer. I started off using a 40 degree nozzle on the Pergola, handrails and wall, and used a surface cleaner on the deck surface itself. Worked in approximately 10 x 10′ sections starting in the back corner, working my way towards the front, ensuring I went high to low. Walls, Rails, Pergola, Deck surface. After completing the whole deck with the cleaner, I went back to where I once began earlier that morning and started brightening, same process same pattern, 10 x 10 sections working my way back towards the front. This is where the magic really started to happen (see photos were I spilled a little)……As sections begun to dry that I had done earlier in the day, you could really tell how well the product was working. It was not until the next day, where I would really see the fruits of my labor after it fully dried.
STAIN DAY!!!
The following day, after drying overnight it was time to stain. I once again started on the rails, working my way around, using a drop cloth under the rails to try and prevent splatter, and shortly realize this was nearly impossible and would take too much time. I resorted to using my small paint sprayer for the rails given all the nook and cranies. It took me a little while to dial in the settings but I finally got it to where it would coat evenly. I then moved onto the Pergola, and after starting with a brush quickly went back to the air sprayer. While I probably lost a lot of product doing it this way, there was a large amount of surface area to cover, and frankly it was taking forever with a paint brush as the larger brush would not fit in the small sections, and the overhead work was killing my shoulders. Once the rails and Pergola were done, I moved onto the back wall utilizing the 14 inch brush, and this went extremely quickly. Once this was done it was time to do the deck. Once again utilizing the 14 inch brush, this all was a rather quick process working in small sections at a time. I finished around 3 PM on day 2, then stood back and got an idea for what it was really going to look like.
After letting it dry overnight I decided to do 1 more coat, just to help blend in some sections and areas that may have been a little light or heavy with the stain. I am glad I did this, and you could tell how much less stain I had to use the second time as the wood already took in the majority of it from the day prior. The deck is 36×40 = 1440 Sq ft, minus the 25ft pool, plus the back wall (6’x40ft), plus the pergola, and rails. I ended up ordering 4 of the 5 gallon stain cleaner/brighter combo kits, for a total of 20 gallons. I had 2.5 galls of stain left after 2 coats.
After drying I could not be more satisfied with the results. There certainly are some spots where the stain ran, or had streak marks, but this is a product of me rushing due to the amount of surface area I had to cover, and not the product itself. In all I am hoping to get 5 years out of this before I have to do it again, and will have an older kid by then that can do it next time!
Looks great!